

5 String Banjo Chord Inversions - How To Practice
One of the best things you can do to learn the entire fingerboard of a banjo and begin playing all the way up the neck is to learn your chord inversions. By learning these chord inversion shapes and being able to move easily from one to another your playing will really start to open up.
The first thing I would recommend is to know your movable inversion chord shapes for major triads. Then move on to minor triads, and dominant seventh chords. To learn these shapes, download our free 5-string banjo chord chart via the form below if you have not already.
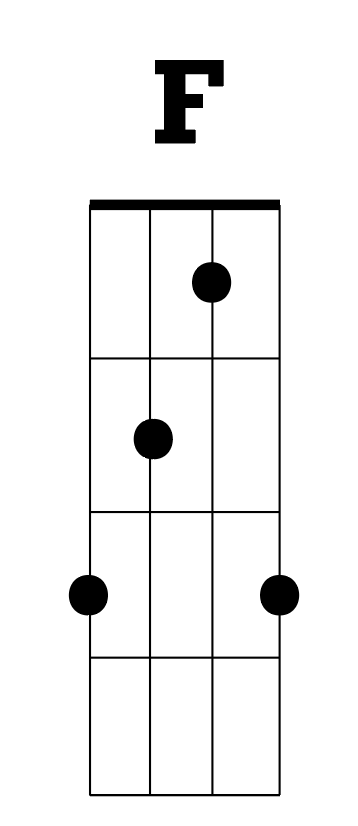
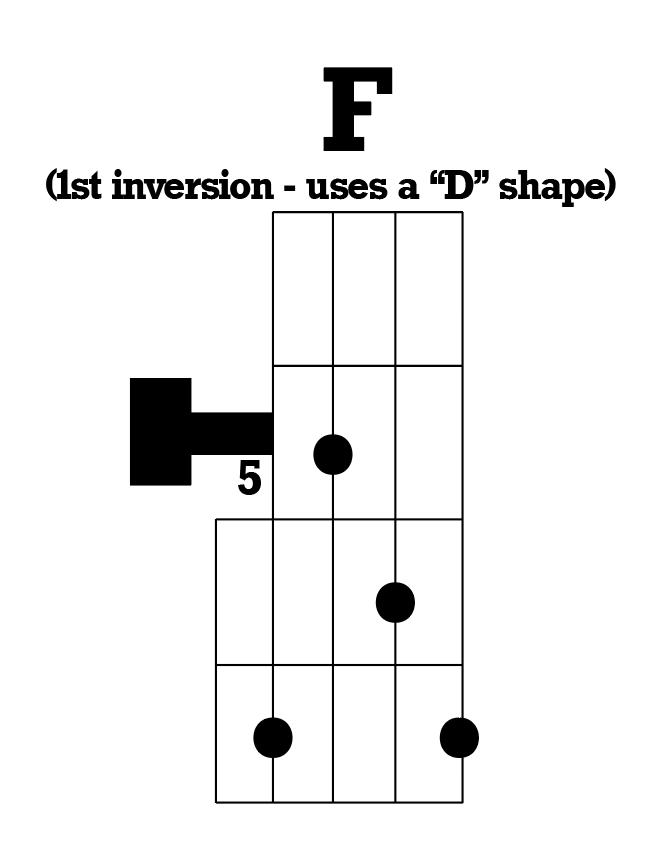
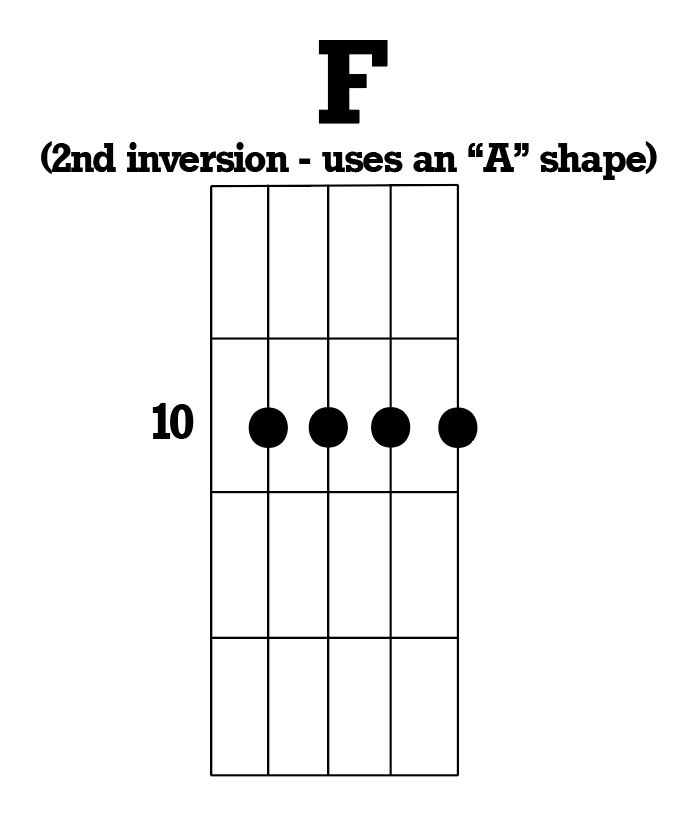
Let's start with the F major triad. When look at our chord chart, we are focusing on the "Movable Shapes". In true music theory, you would call the chord with the root in the bass the root position. The following chords with the 3rd or the 5th and so on in the bass would then be the 1st inversion (3rd in the bass) or the 2nd inversion (5th in the bass).
For simplicity's sake, we are going to call the movable chord shape that is lowest down on the neck of the banjo (closest to the nut of the banjo) the 1st position. The following shape will be called 2nd position, and so on.
This then repeats at the 13th fret with the 1st position shape, and so on. Set your metronome at 60 beats per minute and try playing the 1st position shape. Then move to the next shape up and play that one. Starting out you might need to play a chord every other click of your metronome. Move all the way up the neck and then turn around and come down. Practice this going up and down over and over again without stopping for about 15 minutes. Don't worry right now about getting every note to ring clearly. Focus on moving and playing in time with the metronome.
When this becomes fairly easy to do, try doing this with another major triad. Try a B triad next. Here you would be starting with your 3rd position shape ( the bar chord shape) on the 4th fret. Your next shape would be the 1st position shape (lowest note would be on the 7th fret). Then move to the 2nd position shape. Again, keep going all of the way up the neck and practice with the metronome.
Try going through all 12 of your major triads. When you are done with this, move on to your minor triads. After the minor triads, move on to your dominant 7th chords (7th chords such as F7 or D7). As you are doing this, make sure you are trying to understand the relationship of the major triads to the minor triads. What note is different? Do you see a pattern?


Go to dialysis 3 days a wk for 4 hrs is there some way to excercise my hand with a banjio
Leave a comment